Is it time for a spring clean?

Winter has almost gone, says I as I’m scraping the ice off the car again this morning!


Of course by lunchtime that frost has cleared and the clear sky means a lovely early spring sunshine emerges.


That spring sunshine however has the less than desired effect of bouncing off all those surfaces covered with a layer of dust, and the cobwebs which have kept the spiders in food all winter.

So now is the official time for a spring clean, well in my house anyway!


It’s a great opportunity to have a good old sort out and a rearrange whilst I’m at it.

What I tend to do is to take a room at a time, I take all my ornaments and bits out to give them a good clean and polish. I pull all the furniture into the centre of the room to give behind and underneath a good vacuum, I then tackle all those corners where the cobwebs have been un-disturbed all winter. Picture frames, top of doors, switches and sockets get a wipe and polish. Then finally all the furniture gets pushed back.

When it comes to bringing all the ornamental bits back in, I like to have a good rearrange and swap a few bits over to introduce lighter, brighter spring colours. Another great excuse for a bit of retail therapy.


A vase of fresh flowers and voila! onto the next room.


Do other people have a good spring clean at this time of year?

Do you do anything special to prepare your house for summer?

I’d love to hear from you


I Love my lightbox

Having seen pictures of light-boxes all over social media, I really liked the idea of them. A little fun way of leaving messages/reminders around the house, or to add words to pictures.

    
All the light-boxes I seem to be looking at varied in  price between £29.99 and £40 and upwards if you wanted coloured letters etc.

img_6607


So when I eventually saw a post on Instagram which said they were available from The Range for £14.99, I decided I needed to get one. Our nearest Range is some distance away but this weekend whilst visiting our sons in Birmingham we made a special trip to the Range in Erdington and had a good look around.

img_6654

Of course we couldn’t find them, but eventually once we’d asked a couple of different assistants, The last one was found underneath the Valentines Day display table.

img_6752

The light-box is battery operated or mains, although doesn’t actually come with a mains adapter. So we put in 4 AA batteries and on it came. There are plenty of letters to spell lots of phrases, so now some imagination and inspiration is all that is required.

img_6645

I did notice the image on the packaging was a light box displaying Christmas 2015 and did think it was very apt as this is very much a fad of the moment……..but we all love a good fad!

Gluten Free Baking – Chocolate Eclairs

IMG_5799

I couldn’t help myself, they were serving chocolate eclairs for pudding at school this week. Just watching people devour that lovely chocolate coated, cream filled patisserie, my mouth was watering. Of course, to my knowledge, you can’t buy GF eclairs, not round here anyway but you can buy GF profiteroles from Tesco so they can’t be impossible to make! In those famous words….how hard can it be?

I tend to take a ‘normal’ recipe and see if I can substitute in GF flour. Quite often due to the fineness of GF flour it often takes more than the recipe calls for, the key is to work out how much more.

I set about with an online recipe and by a little trial and error modified the recipe until the consistency felt right.

The ingredients are fairly straightforward;

150g GF self raising flour

1/2 tsp baking powder

1 tsp sugar

150ml water

75g butter

2 eggs

Start by sifting the flour into a bowl and add the baking powder and sugar.

Melt the butter and water in a saucepan on a low heat, then bring to the boil.

As soon as it is boiling, remove from the heat and add the flour mix in one go. Using a wooden spoon beat to form a soft dough.

Allow to cool a little then add the eggs to the mix and beat thoroughly to mix them in, initially it will feel like they don’t want to mix in, but keep going they will eventually form a smooth shiny dough.

Break off balls of dough and form them into eclair shaped pieces, lay them onto a grease-proof covered baking tray.

Bake in a preheated oven 170 deg for 25 mins. remove from the oven, turn over and pierce the underside to release the steam. allow to cool for 10 mins.

Cover in melted chocolate and fill with squirty cream

IMG_5806

Enjoy…….

Creating a home gym on a budget

We have been very fortunate to have had a free corporate membership of a gym for the last 8 years, sometimes we used it 3 or 4 times a week and other times we could go for 3 months without going. That is the nature of gym membership, some 70% of memberships are rarely used.

download So now that I’ve left the job and no longer have the free membership we were in a dilemma last year when we decided we really needed to get back our fitness and get into shape. We weighed up the options of re-joining our old gym. This gym in Oxford is currently £82 a month plus £30 joining fee per person. For a 12 month package that would amount to £2012 for the two of us. I know for that fee you would get the full facilities including classes and swimming etc but we also knew from our previous use that the only things we really use were the fitness machines and weights machines. In fact my preferred machine was the treadmill and occasionally used the bikes.

IMG_5726
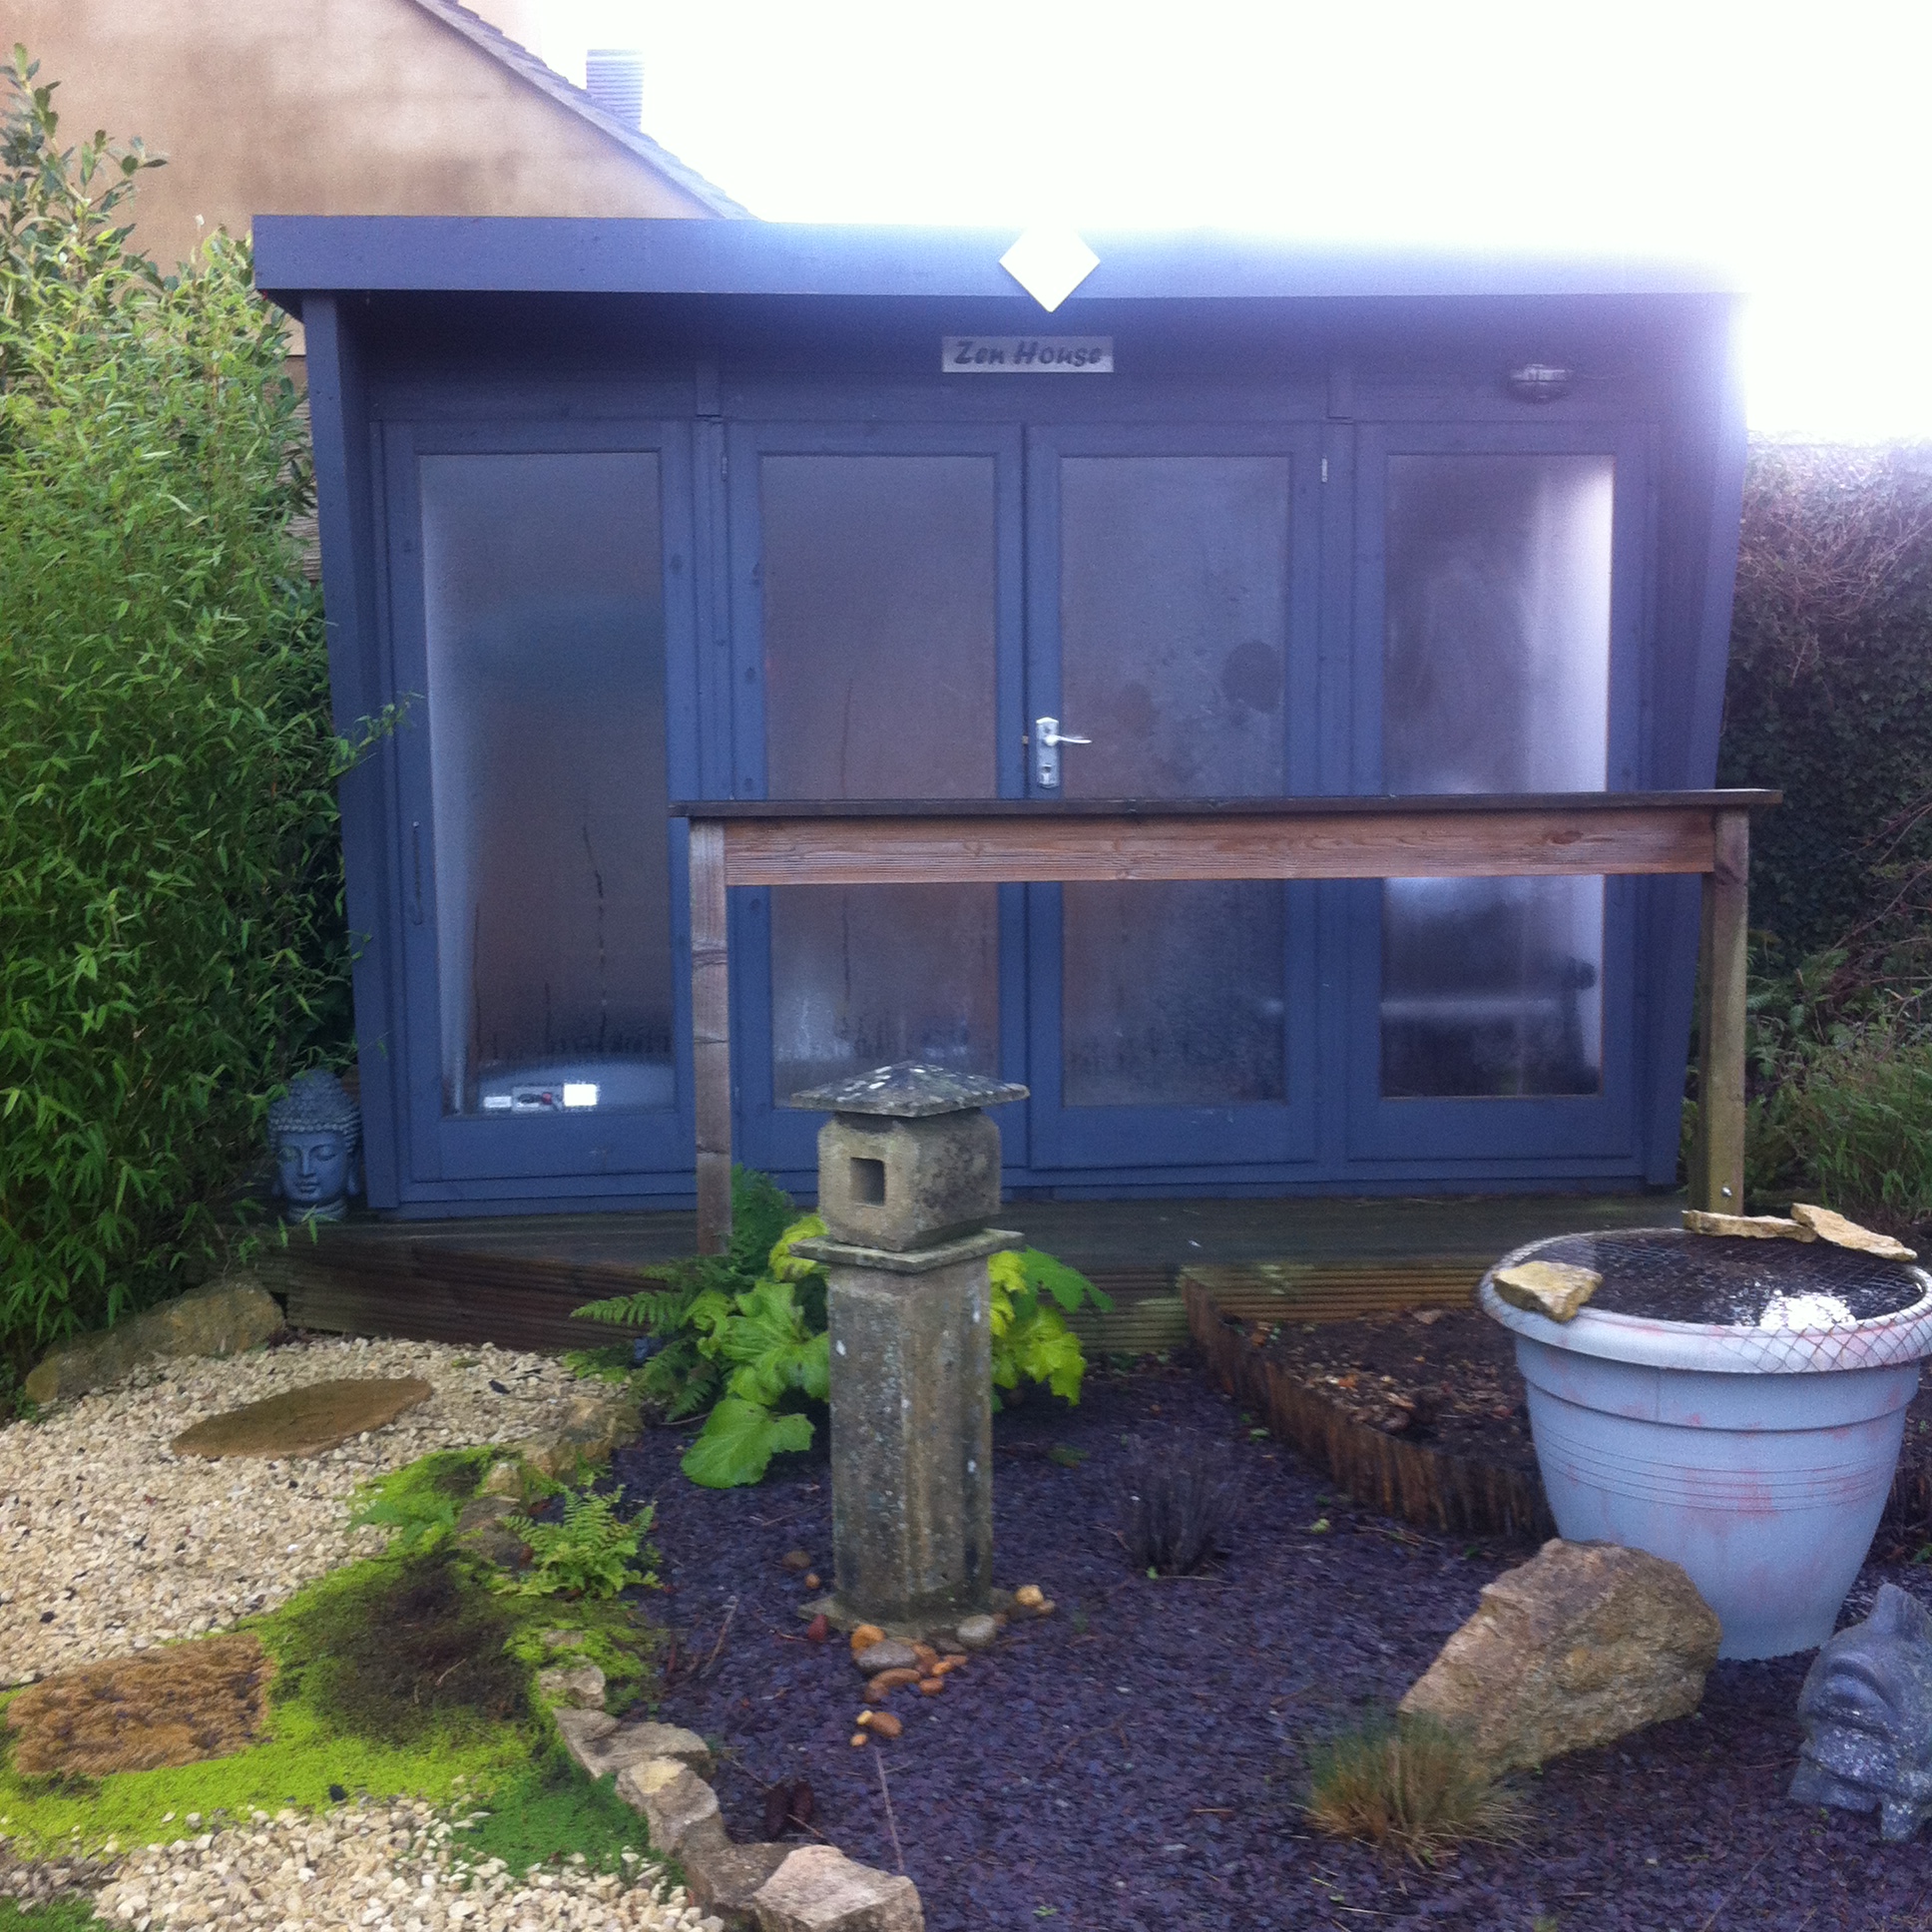
It was at this point we looked into the option of a home gym. We were very lucky that the year before we added a summerhouse to the garden the intention of which was to be a quiet sitting area at the end of the garden. The summerhouse measures 10ft x 8ft and cost approx £1000

IMG_5732 We decided however that perhaps this could house a gym, a perfect solution to our dilemma, it would be a few seconds away, so no excuses you couldn’t be bothered to go to the gym and the machines would always be available.

Our next quest was to find suitable equipment that would be professional enough to feel you were getting a decent workout but wouldn’t be too expensive. Ebay was the perfect answer and we found a 2nd hand professional treadmill only 10 or so miles away and only £150. It was a bit of a mission getting it in the car and home, but we did it.

IMG_5729

We also wanted a weights machine which we found in Argos in the sale, £120 and it would have sufficient weights for the workouts we were intending. Again the assembly was somewhat stressful but several hours later it was up and running.

IMG_5727

Over the following few months as we were using the home gym on a regular basis we had 3 or 4 trips to decathlon who do a fantastic range of exercise equipment and added hand weights, kettle bells, an inflatable ball and exercise bench to our set up.

IMG_5728

The total cost of equipping the gym came to approx £350 and since creating our home gym I use the treadmill every evening for 1/2 hour when I get in from work and in the morning on a weekend except during the winter months when the evenings were too dark and I used it on a Saturday and Sunday morning only. A real saving on even one years gym membership and we’ve now had our gym for nearly 2 years. Now we are heading towards the spring again, my evening routine is about to recommence…..

IMG_5731

Gluten free soda bread, a quick and easy recipe

img_2684

I’ve been diagnosed coeliac for the last 10 years and during that time have experimented with many different GF recipes. Mostly they have been very successful but one area that has not yielded much success is making bread. I brought a bread maker about 5 or 6 years ago in the hopes that this may be the answer, but unfortunately no luck for me. So no matter what I’ve tried, I seem to have spent hours, mixing and proving only to end up with a heavy, solid loaf.

The success came when our sons jointly bought me a KitchenAid, a special treat for my ‘big’ birthday. Also I found a recipe for a no yeast, no proving needed, soda bread recipe.

The kitchen aid comes with three attachments, one of which is a dough hook,


The dough hook has the action of kneeding the mix to add air, which I do remember back from my childhood days of my Mums old Kenwood Chef.

 
                                                  credit: pinterest

So I set about experimenting to create the soda bread. One of the key things it seems to me, is that you are always told not to overwork the GF flour, so in the past I would’ve done a limited amount of kneeding, but oh no, it seems that allowing the dough hook to thoroughly mix and then kneed the dough seems to be the answer.

Recipe:

400g GF Self raising four (some extra if the mixture seems too wet)

1/2 tsp baking power

1/2 tsp bicarbonate of soda

300ml butter milk

1 egg

Mix the egg with the buttermilk, then add all ingredients into the KitchenAid

With the dough hook attachment, allow all the ingredients to thoroughly combine, ensure all the flour has mixed in,

Then allow the dough hook to mix for at least 10mins.

Prepare either a 1lb loaf tin or a baking tray.

Either put all the mixture into the loaf tin and bake at 160 deg for 35 to 40 mins

or place small balls of dough on the baking tray and bake at 160 deg for 25 -30 mins.

The dough will rise beautifully giving tasty soft textured bread.


Best eaten the same day ?