Want a colourful garden this summer? – plan now, seeds, plugs or trays of bedding plants 

It’s that time of year again, if we are going to have lots of colour in the garden this summer we need to make plans.

IMG_1550

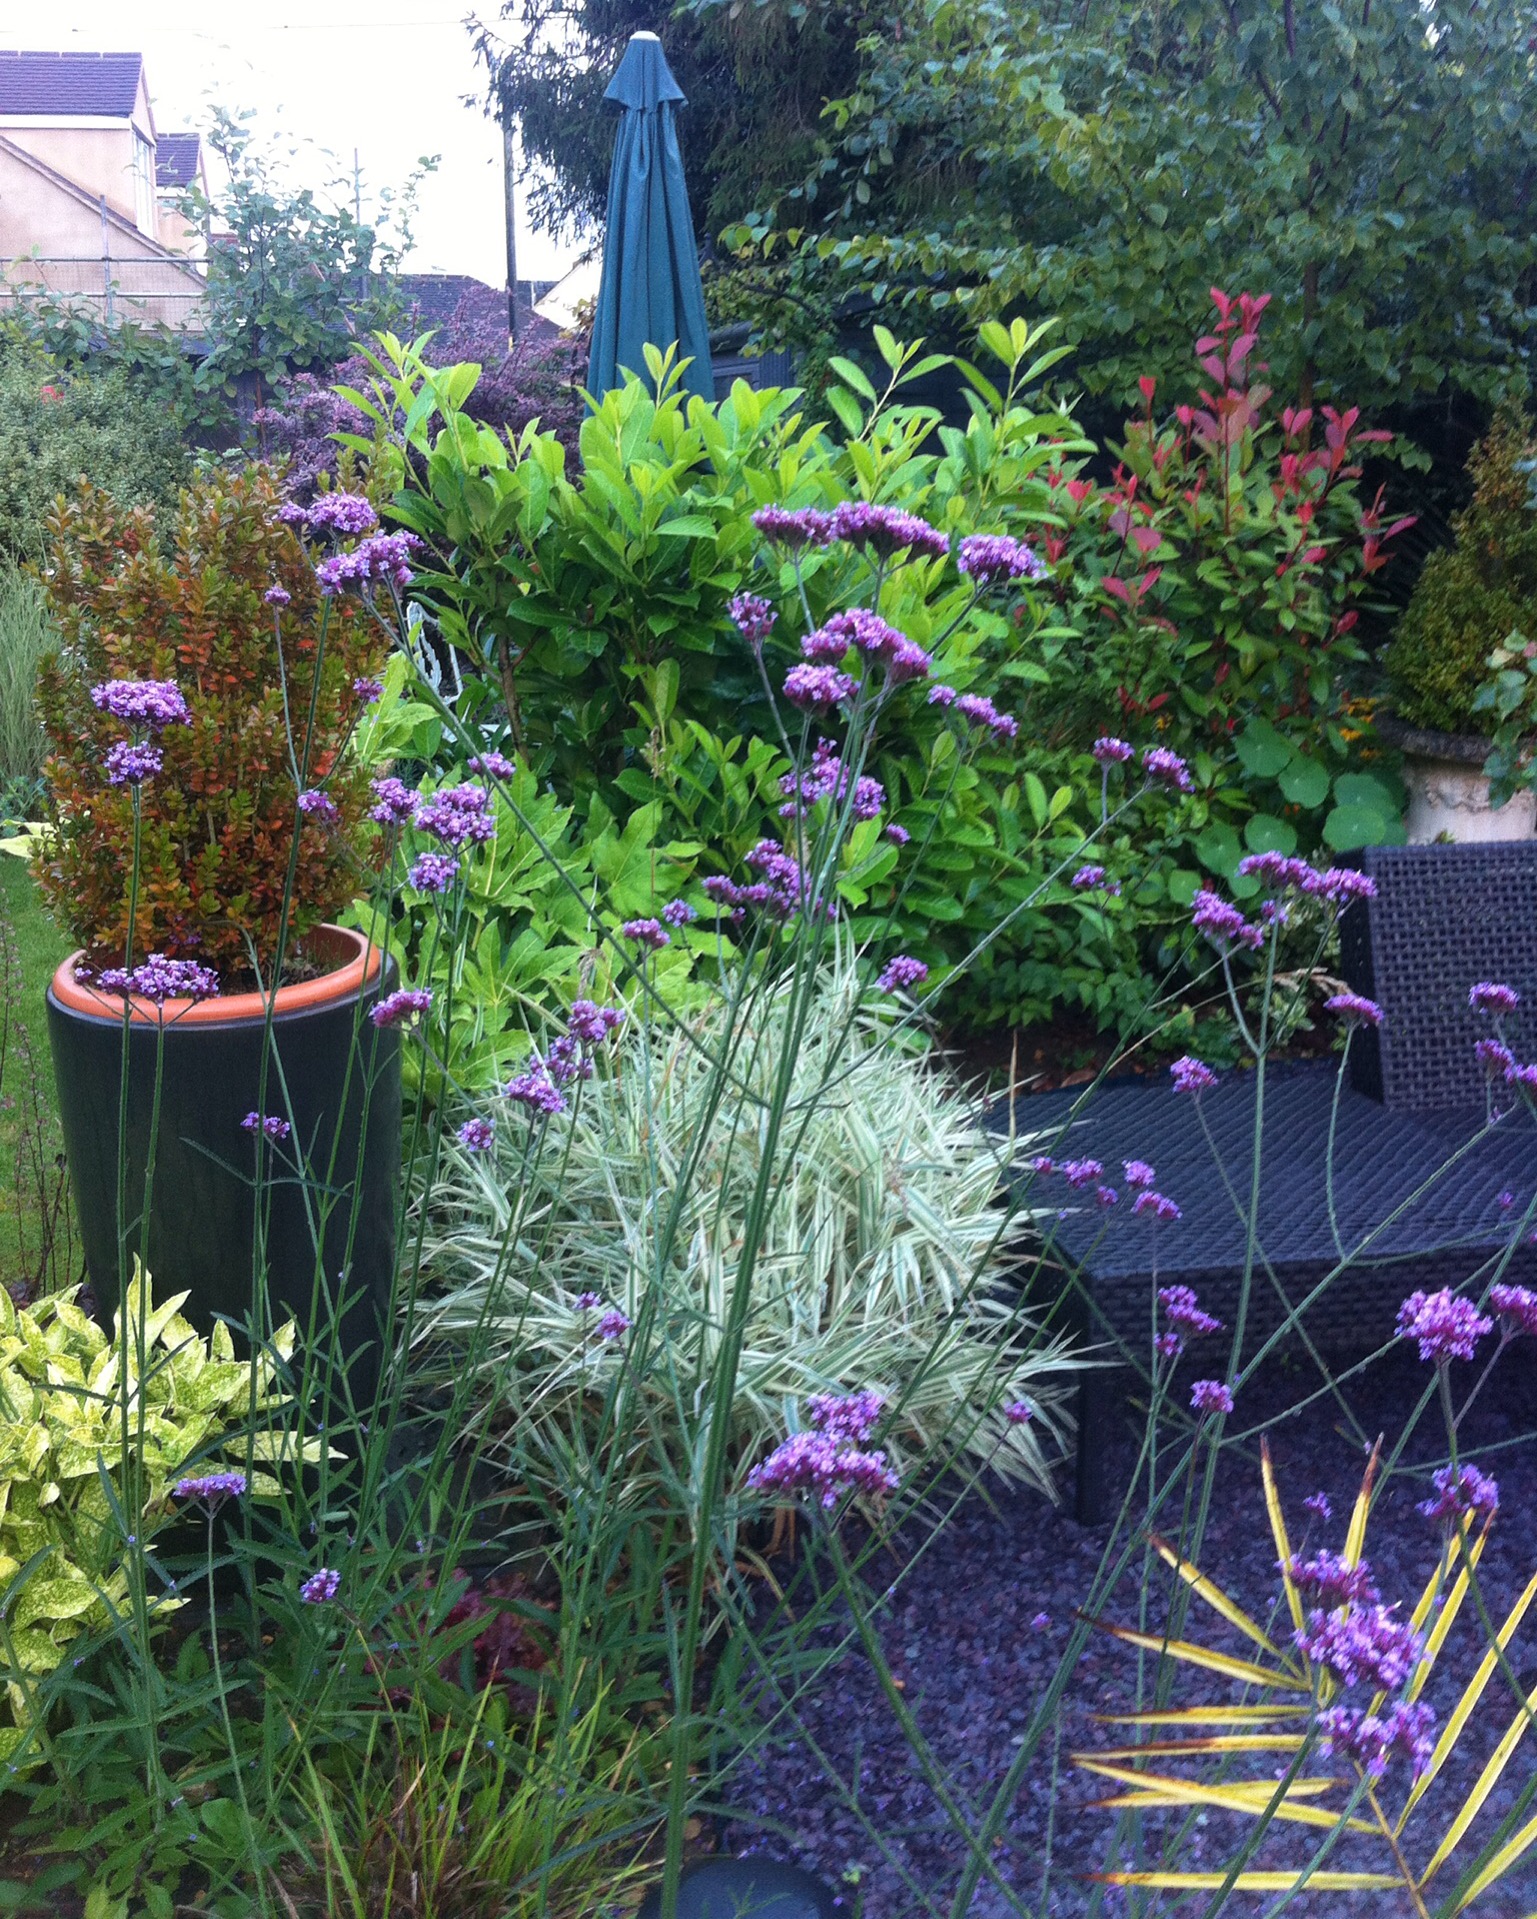
In my garden, I have shrubs which provide structure and greenery all your round. Some of them also flower at different times in the season. I also have perennials which come up every year without too much maintenance, they provide lots of lovely colour and some of those have a long flowering season, all throughout the summer.

IMG_2008.JPG (2)

But I also have some areas of the garden which just need an injection of colour. This I provide with bedding plants (annuals) Bedding plants are very tender and do not survive frost so are grown and replaced each year. Bedding plants have the big advantage they provide lots of colour and can be placed wherever there is a gap.

I tend to fill pots with bedding which I can move around the garden to the gaps as well as planting others within the border.

IMG_2051.JPG (2)

At this time of year we need to make a decision how we are going to get our bedding plants, there are 3 options.

From seed – a pack of seeds costs around £1 and can be sewn in a propagator at this time of year on a windowsill in the house. They will germinate producing lots of seedlings which will need to be pricked out into trays as soon as they get big enough.

From plug plants – you order them now and they will be grown by the merchants until they get big enough to be sent out, normally the end of March

plug plantsmini-plug


They still need potting on but the growth success rate is much greater. Each plug plant cost between about 20p to 50p although if you buy in bulk it does bring the price down. This year I would like to grow some Cosmos,

I can get 60 large plugs for £16.99 delivered w/c 14th March

Or ready grown plants which are available in packs of 6 or so available in the garden centres ready to plant out after May. Typically a pack of 6 bedding plants costs £4.99

Of course although they may be pricey all the hard work is done for you and all that is left is to plant these exactly where you would like them to grow anytime after the last risk of frost, normally around middle of the May.

My personal choice is plug plants and I have just placed my order. I look forward to lots of colour in my garden all through the summer….

Photography tips to liven up your instagram feed — flowers in a vase or out

It is lovely to have fresh flowers in the house, they are so beautiful to look at and instantly brighten your day. The trouble is, at best they will last about 2 weeks before inevitably they start to wilt and no longer look their best, so I like to photograph them. Although I only use my iphone camera, with no special lighting or lenses, the effects that can be created can still be stunning.

img_2684

To capture them at their best, photographing them in their vase is an option, especially if photographed in a pretty setting with a prop or two.

However you can also go for a more casual picture, as if you’ve just returned from the flower market with large bunches of flowers and placed them down.


This picture was taken with the flowers carefully placed on a wooden board to create the illusion of a casual picture. Play around with the placing of each of the stems to give the correct effect.

tulips

In this one, I changed the background and laid the tulips on a freshly ironed piece of grey fabric. This produces a very pleasing contrast, again lay the stems to achieve the desired look, moving them around until you like the result.


I also tried a more formal approach of singling out the stems and lining them up again with the grey background. I’ve been careful to leave the leaves and stems to be less formal to balance out the look.

img_6483

In this picture, I used the mirror to add background detail to make the flowers stand out.

Whichever look to choose in the end, they all have the effect of making your instagram feed look stunning.

Creating a home gym on a budget

We have been very fortunate to have had a free corporate membership of a gym for the last 8 years, sometimes we used it 3 or 4 times a week and other times we could go for 3 months without going. That is the nature of gym membership, some 70% of memberships are rarely used.

download So now that I’ve left the job and no longer have the free membership we were in a dilemma last year when we decided we really needed to get back our fitness and get into shape. We weighed up the options of re-joining our old gym. This gym in Oxford is currently £82 a month plus £30 joining fee per person. For a 12 month package that would amount to £2012 for the two of us. I know for that fee you would get the full facilities including classes and swimming etc but we also knew from our previous use that the only things we really use were the fitness machines and weights machines. In fact my preferred machine was the treadmill and occasionally used the bikes.

IMG_5726
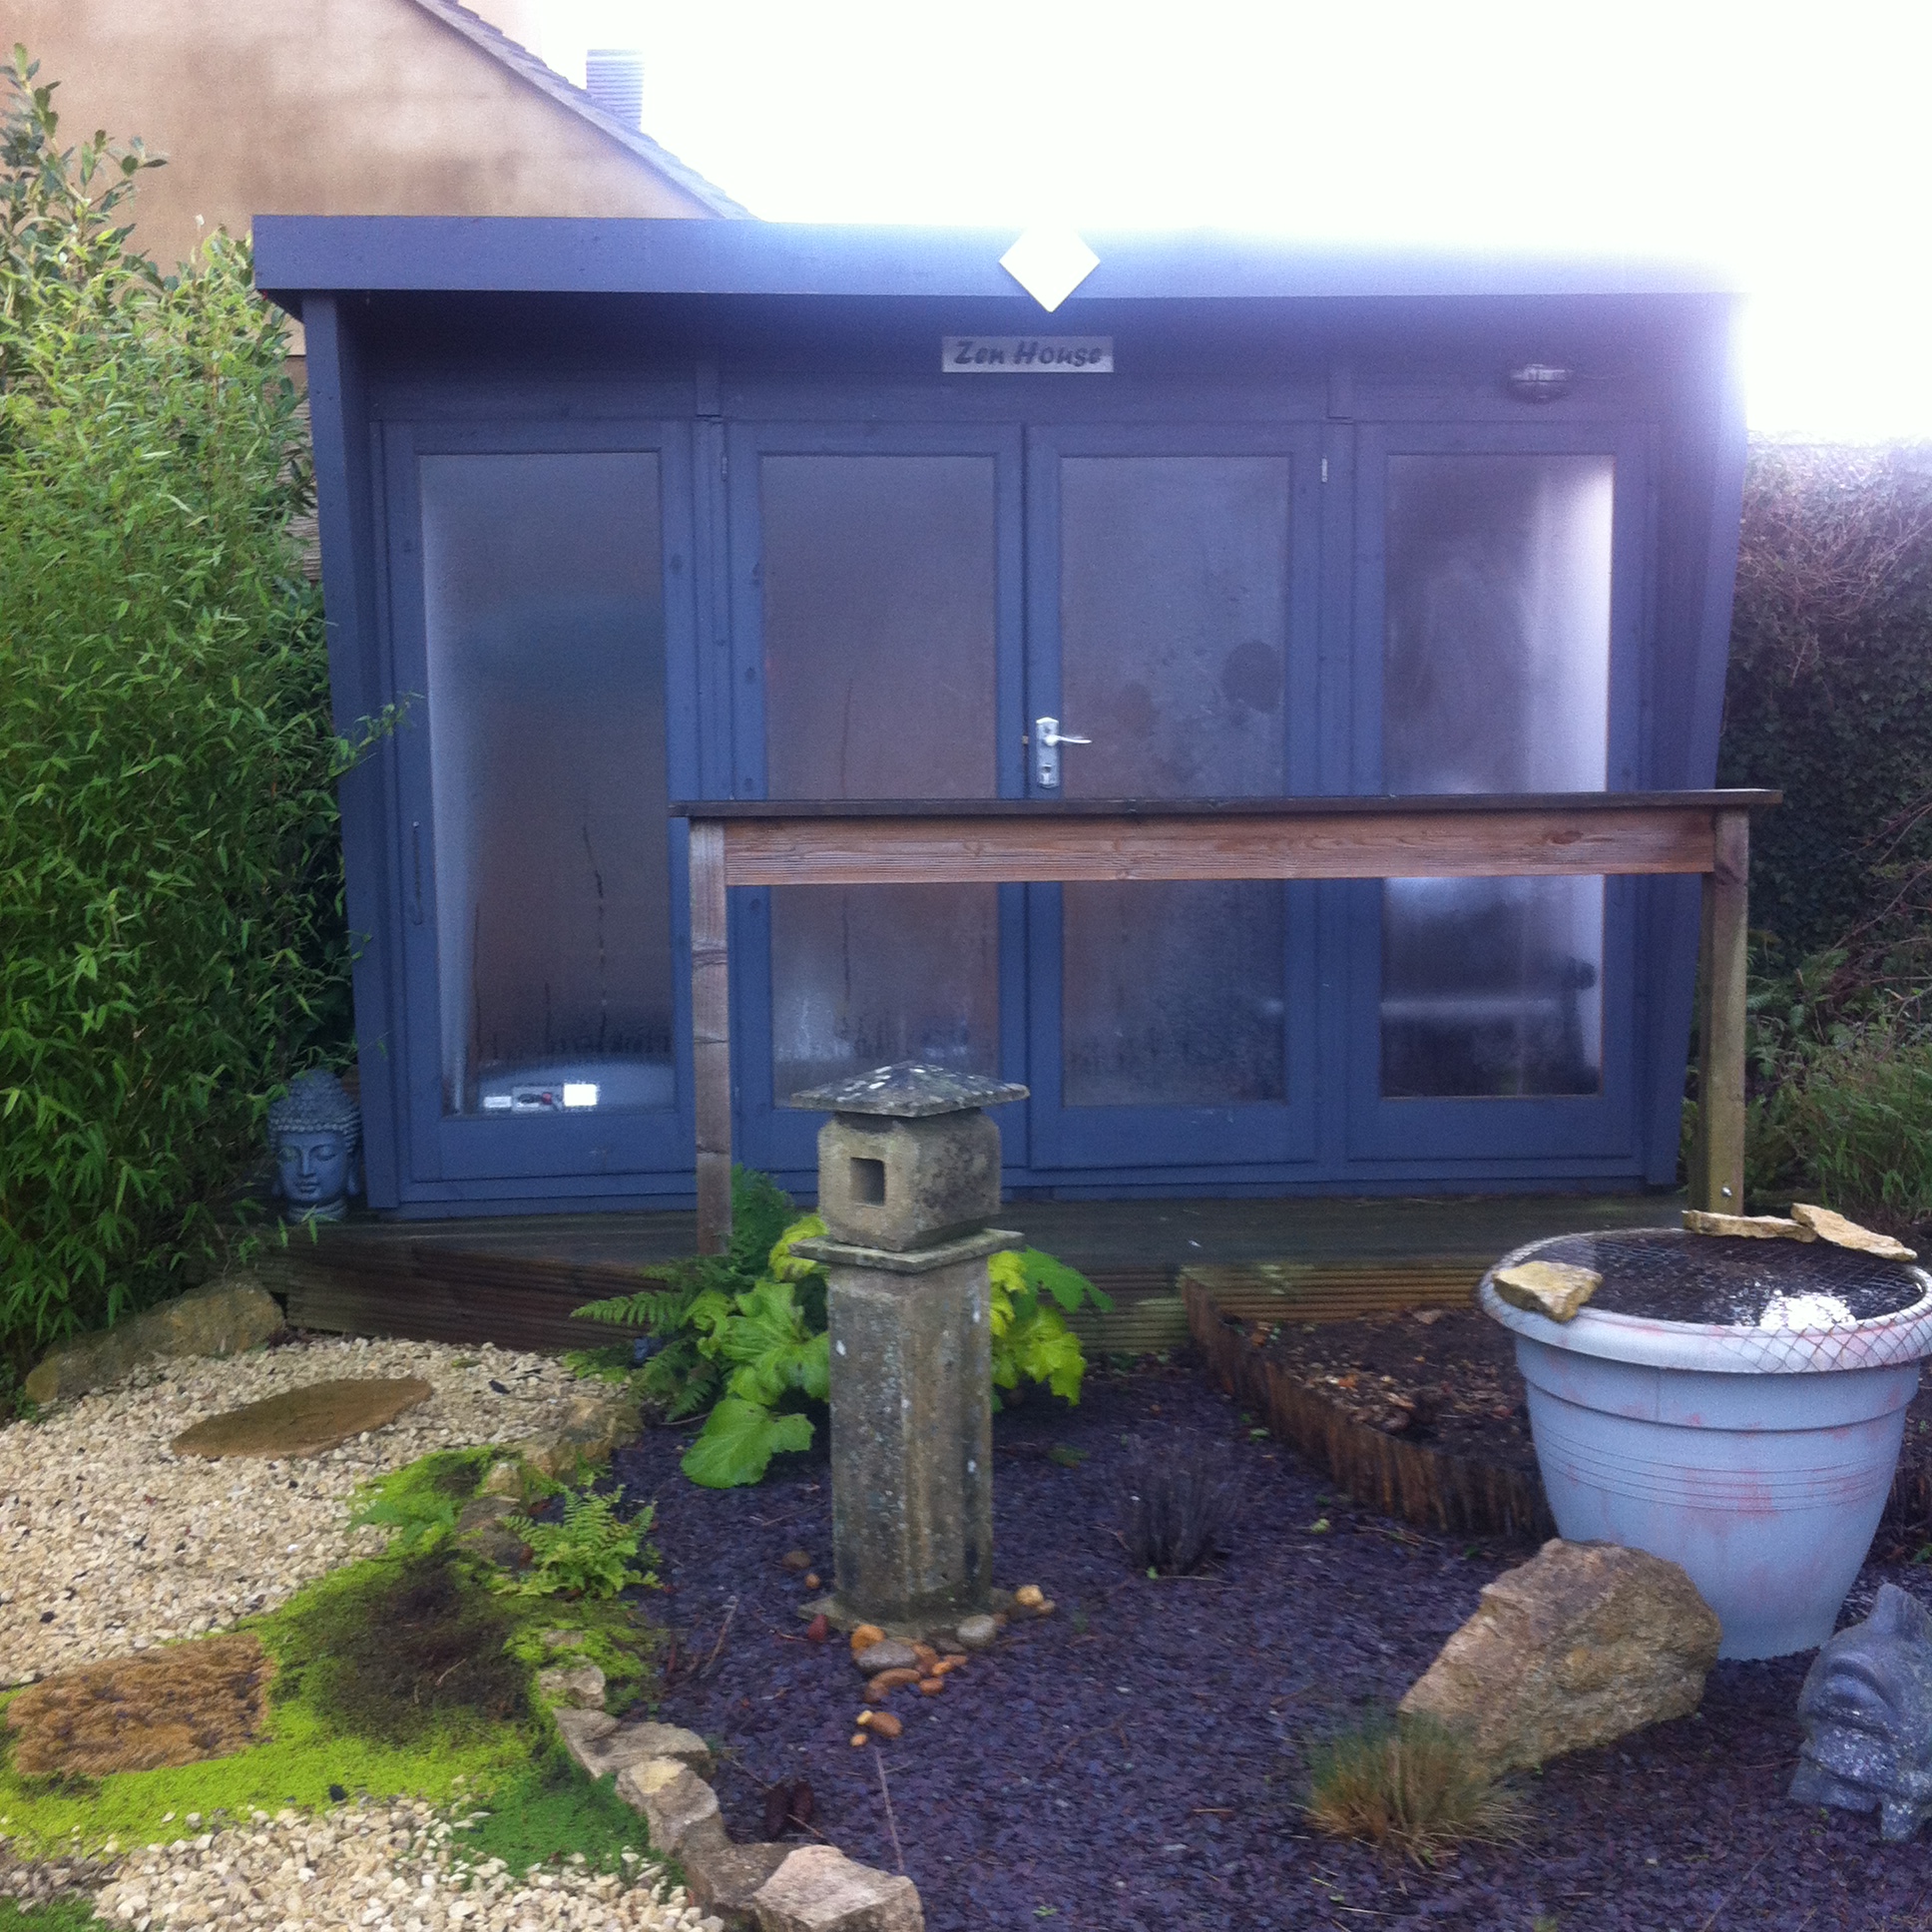
It was at this point we looked into the option of a home gym. We were very lucky that the year before we added a summerhouse to the garden the intention of which was to be a quiet sitting area at the end of the garden. The summerhouse measures 10ft x 8ft and cost approx £1000

IMG_5732 We decided however that perhaps this could house a gym, a perfect solution to our dilemma, it would be a few seconds away, so no excuses you couldn’t be bothered to go to the gym and the machines would always be available.

Our next quest was to find suitable equipment that would be professional enough to feel you were getting a decent workout but wouldn’t be too expensive. Ebay was the perfect answer and we found a 2nd hand professional treadmill only 10 or so miles away and only £150. It was a bit of a mission getting it in the car and home, but we did it.

IMG_5729

We also wanted a weights machine which we found in Argos in the sale, £120 and it would have sufficient weights for the workouts we were intending. Again the assembly was somewhat stressful but several hours later it was up and running.

IMG_5727

Over the following few months as we were using the home gym on a regular basis we had 3 or 4 trips to decathlon who do a fantastic range of exercise equipment and added hand weights, kettle bells, an inflatable ball and exercise bench to our set up.

IMG_5728

The total cost of equipping the gym came to approx £350 and since creating our home gym I use the treadmill every evening for 1/2 hour when I get in from work and in the morning on a weekend except during the winter months when the evenings were too dark and I used it on a Saturday and Sunday morning only. A real saving on even one years gym membership and we’ve now had our gym for nearly 2 years. Now we are heading towards the spring again, my evening routine is about to recommence…..

IMG_5731

Gluten free soda bread, a quick and easy recipe

img_2684

I’ve been diagnosed coeliac for the last 10 years and during that time have experimented with many different GF recipes. Mostly they have been very successful but one area that has not yielded much success is making bread. I brought a bread maker about 5 or 6 years ago in the hopes that this may be the answer, but unfortunately no luck for me. So no matter what I’ve tried, I seem to have spent hours, mixing and proving only to end up with a heavy, solid loaf.

The success came when our sons jointly bought me a KitchenAid, a special treat for my ‘big’ birthday. Also I found a recipe for a no yeast, no proving needed, soda bread recipe.

The kitchen aid comes with three attachments, one of which is a dough hook,


The dough hook has the action of kneeding the mix to add air, which I do remember back from my childhood days of my Mums old Kenwood Chef.

 
                                                  credit: pinterest

So I set about experimenting to create the soda bread. One of the key things it seems to me, is that you are always told not to overwork the GF flour, so in the past I would’ve done a limited amount of kneeding, but oh no, it seems that allowing the dough hook to thoroughly mix and then kneed the dough seems to be the answer.

Recipe:

400g GF Self raising four (some extra if the mixture seems too wet)

1/2 tsp baking power

1/2 tsp bicarbonate of soda

300ml butter milk

1 egg

Mix the egg with the buttermilk, then add all ingredients into the KitchenAid

With the dough hook attachment, allow all the ingredients to thoroughly combine, ensure all the flour has mixed in,

Then allow the dough hook to mix for at least 10mins.

Prepare either a 1lb loaf tin or a baking tray.

Either put all the mixture into the loaf tin and bake at 160 deg for 35 to 40 mins

or place small balls of dough on the baking tray and bake at 160 deg for 25 -30 mins.

The dough will rise beautifully giving tasty soft textured bread.


Best eaten the same day ?

Is it time for a decorating refresh?

Our kitchen was one of the first rooms we decorated when we re-modelled the house. As we have gloss white units we decided to paint an accent wall behind the cupboards a colour that would make the white stand out against it. This bright teal blue was chosen to blend with the duck egg blue on the other three walls and provide a real statement.


Of course that was 4 years and since then we have added this painted grey bookcase bureau and have replaced most of the white stools with grey. Just recently I’ve started to think the bright colour is beginning to look quite dated and every time I look at it I think perhaps it’s time for a refresh. The trouble is what colour to choose?


I like the Laura Ashley pale duck egg on the other three walls so really we need to blend in with that. The white fireplace and gloss white cupboards also need a colour to sit against. We like grey and have grey in nearly all the other rooms in the house in various Farrow and Ball colours, so wonder if another room painted grey would be a bit too much?


Out with the paint charts and glass of wine and let’s see if we can make any progress and come to any conclusions, Wish me luck!